

Teensy 4.1 HX711 Load Cell Tutorial
Tutorial Aim:
In this tutorial, we will create a digital scale using a Teensy microcontroller, a load cell, and the HX711 amplifier. Our goal is to build and calibrate the scale. Then, we'll proceed to measure the weight of objects and calculate the average weight from multiple readings.
Introduction:
This straight bar load cell, sometimes also called a strain gauge, is like a translator for pressure or force. As the changes in strain when weighting objects is so small, we'll need an amplifier such as the HX711 amplifier. These gauges are commonly incorporated into applications requiring mass calculation and tracking changes in weight over time.
Key Concepts:
- How A Strain Gauge Works: A strain gauge measures the electrical resistance when the bar is pushed or pulled. The resistance of the strain gauges varies when an external force is applied to an object, which results in a deformation of the object’s shape (in this case, the metal bar). The strain gauge resistance is proportional to the load applied, which allows us to calculate the weight of objects. Calibrating against a known source is recommended.
- Setting Up The Scale: Placing plates on a spacer connected to the strain gauge on opposite ends pushes the load cell when a weight is placed on top. From this, we calculate the objects weight using electrical resistance & amplifier.
- Calibrating The Scale: Determining the calibration factor so that all weight measurements are accurate.
Please note, this tutorial continues from the "Getting Started With Teensy And The Arduino IDE" tutorial. It is recommended to follow this tutorial to familiarize yourself with the Arduino IDE and Teensy microcontroller.
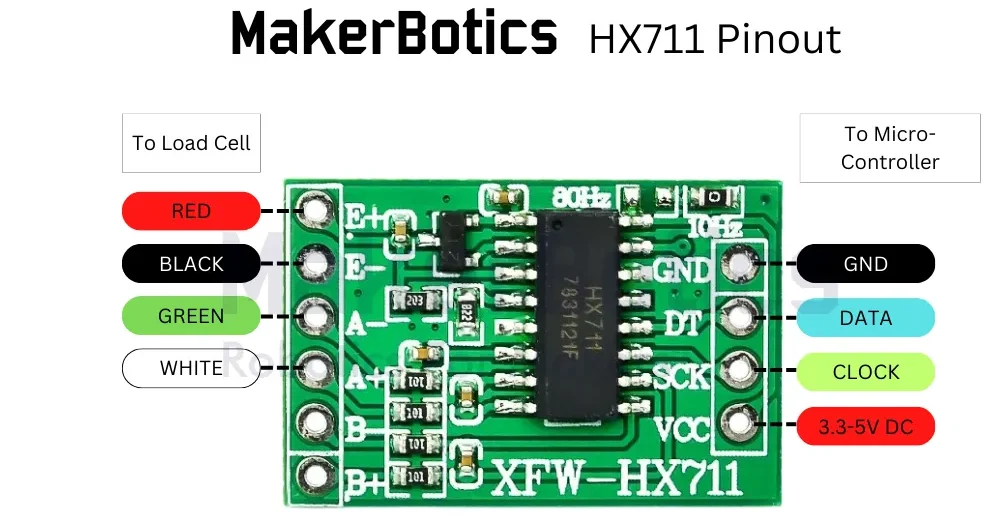
Pin Layout:
The pin layout between the Teensy and the HX711 Amplifier is shown in the table below.
Note: You can use a Teensy 4.1 or Teensy 4.0 microcontroller for this tutorial with no changes to the pinout.
| Sensor Pin | Teensy Pin |
| GND | GND |
| VCC | 3.3V |
| DT | 26 |
| SCK | 27 |
Setup:
Note: This mechanical assembly of the load cell is optional.
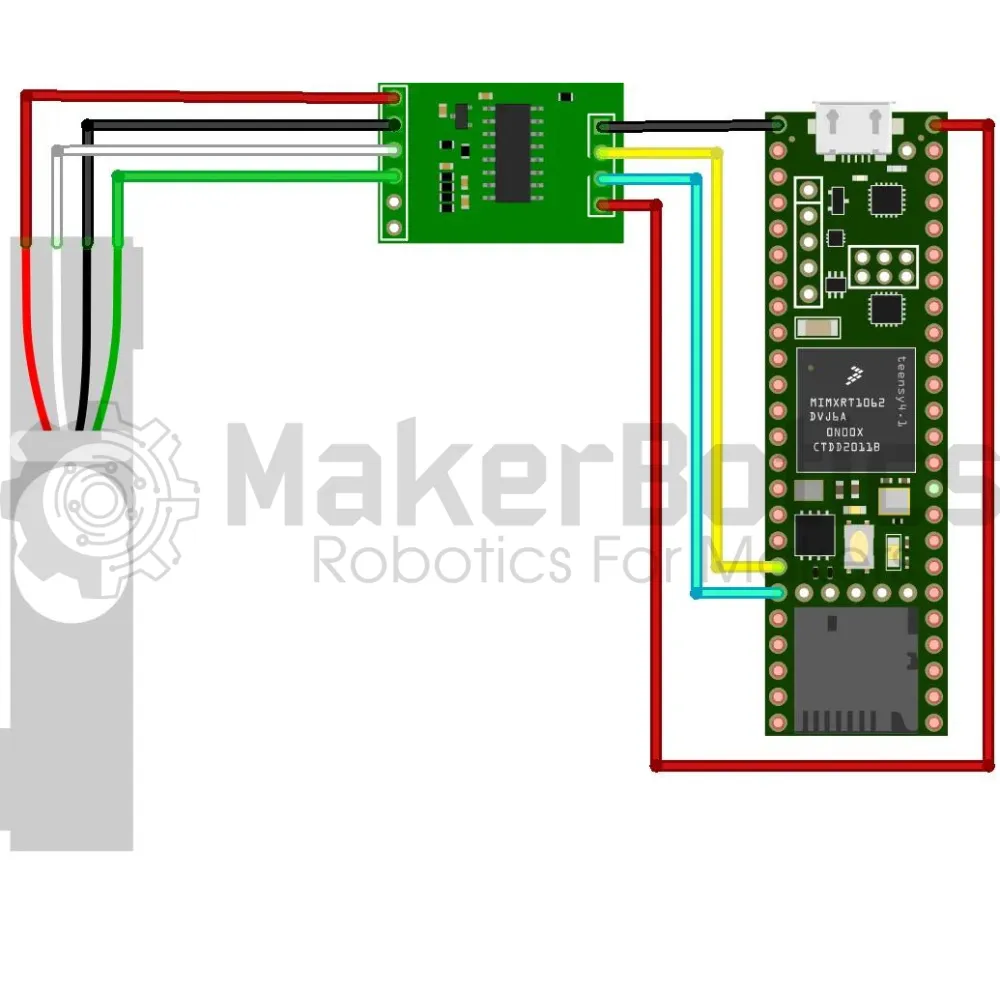
Please refer to image below for assembling the load cell and plates. Please note that these files are available in the Downloadable Content section of this tutorial.
- Place 2 spacers on the load cell, one on either side of the cell and on opposite ends, and then place a plate on top of the spacers.

- Connect the load cell’s SCK pin to pin 27 & SCL pin to pin 26 on the Teensy 4.1 using the Male to Male jumper wires.
- Open the Arduino IDE
- Connect the Teensy to the computer via USB
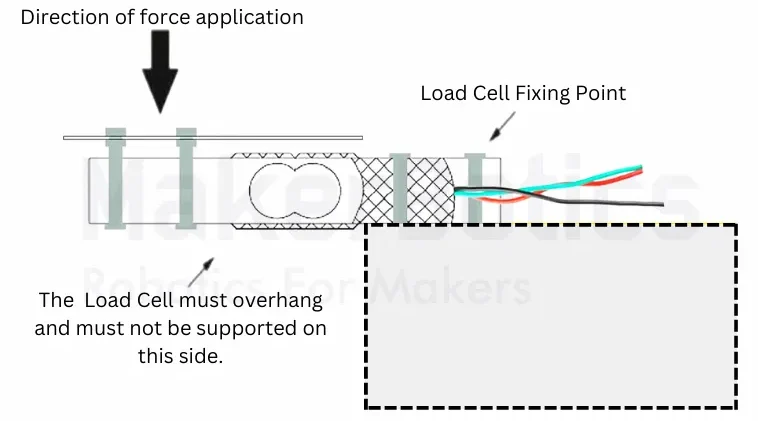
Working Principle
As shown below, the load cell is fixed at 1 point (the side with cables) and the other side is left to overhang. This will ensure that the the load cell will undergo deflection/strain and the amplifier will feed signal data to the controller.
Code Walk Through:
Code Integration:
There are two pieces of code that will need to be uploaded to the Teensy Microcontroller separately. The first piece of code will be for the calibration of the scale [Load Cell Calibration Code]. Note that there may be slight differences between the load cells so it is recommended to calibrate them for accuracy.
After finding the load cell calibration, we will use this calibration factor in the main code [Digital Scale Full Code].
Libraries:
While there are multiple libraries to get measurements from a load cell, we’ll use the HX711.h library by Rob Tilaart. For the calibration a we need a known weight, ours is 500 grams, please update with your own weight.
For information about the HX711.h library by Rob Tilaart please visit his Github page.
Load Cell Calibration Code Explanation:
Initializing The Sensor:
The sensor & serial monitor are initialized so that the output can be displayed.
Calibrating The Sensor:
We set & tare the sensor before the known weight is weighed for accurate readings, and then calculate the calibration factor using:
Calibration Factor = reading / known weight
Because the output of the sensor is proportional to the force applied to the load cell, you can calibrate your scale using whatever unit makes sense for you.
Lorem ipsum dolor sit amet, consectetur adipiscing elit. Ut elit tellus, luctus nec ullamcorper mattis, pulvinar dapibus leo.
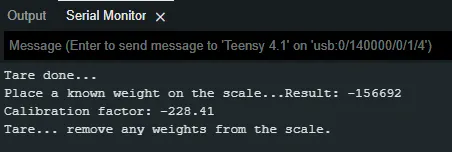
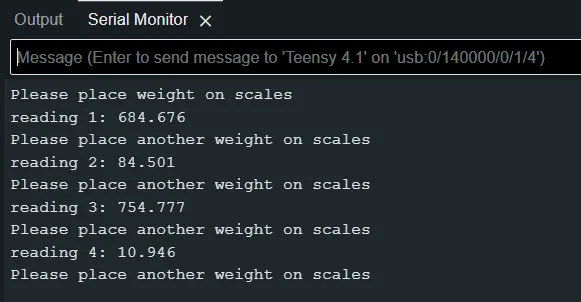
Serial Output:
The reading & calibration factor is displayed on the serial monitor. Take note of this Calibration factor figure for use in the next stage of the programming.
Load Cell Calibration Full Code:
Using The Sensor As A Digital Weight:
Initializing The Sensor:
The sensor & serial monitor are initialized so that the output can be displayed.
Gathering Weight Readings:
We first check if there is an object on the scale, then call get_units() to get the weight readings before displaying them on the serial monitor.
Digital Scale Full Code:
Results
Serial Output:
The weight is displayed on the serial monitor. Note that the weight is in grams
Downloadable Content:
Please find this tutorial's code and the files for the dxf plates for the project on our GitHub page.
Credits:
- Rob Tilaart (HX711 Library)
- The Maker Comunity
- The STEM Community