

Micro:Bit Light Measurement Tutorial
Tutorial Aim:
The aim of this tutorial is to use a BBC micro:bit with a photoresistor (LDR) sensor to measure light levels and display them as a percentage on the micro:bit’s LED screen. By reading the sensor’s analog values, the micro:bit converts light intensity into an easy-to-understand percentage format.
Requirements:
This tutorial makes use of the Micro:bit Electronics Learning Package
Pin Layout:
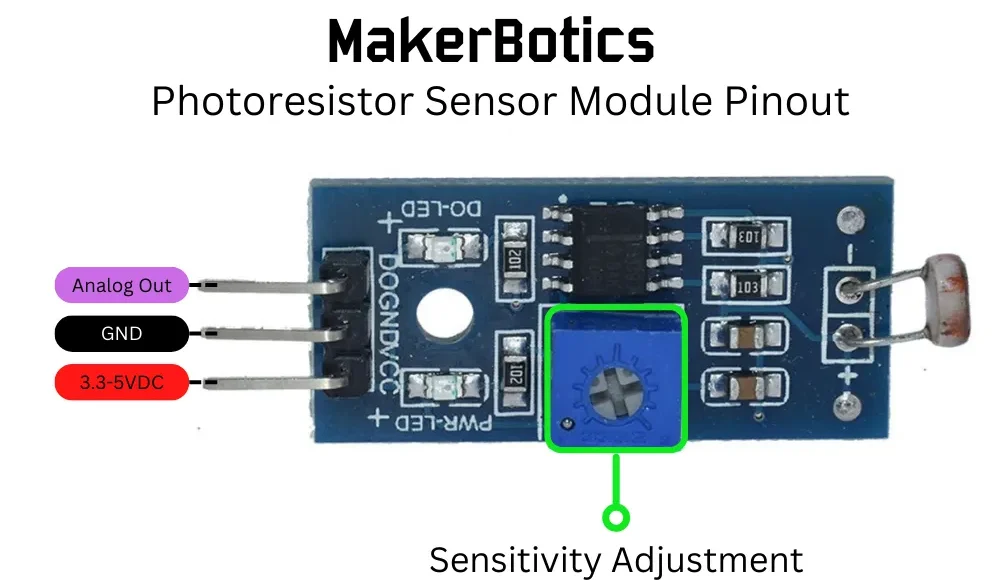
| Micro:Bit Pins: | Photoresistor Module Pins: |
| GND | GND |
| 3.3V | VCC |
| 0 | D0 |
Setup:
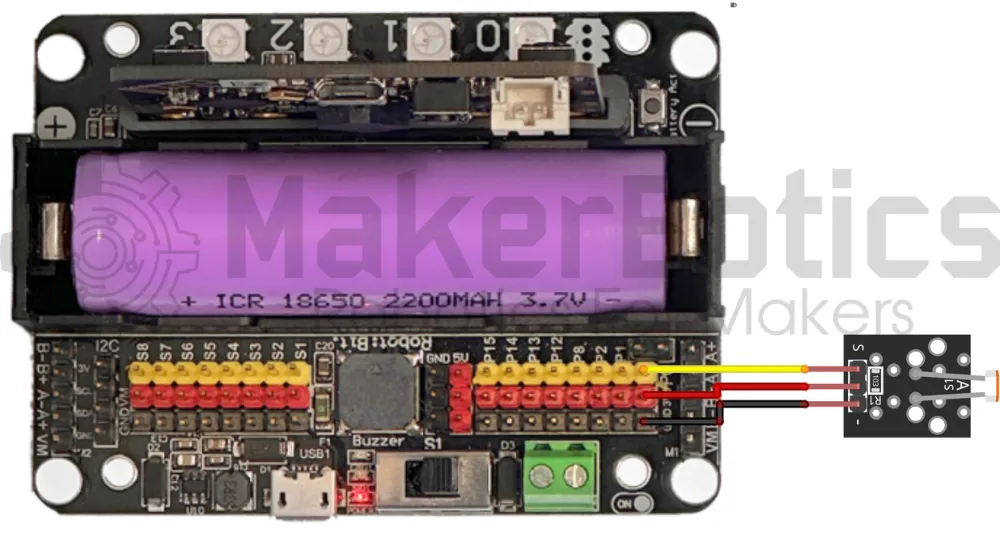
Please refer to the wiring diagram below.
- Connect the Photoresistor (LDR) Module Sensor Module to pin 0 on the Micro:Bit using the FF jumper wires
- Open Microsoft Makecode
- Plug in the Micro:bit to the computer
Code Walk Through:
Calculating the light level:
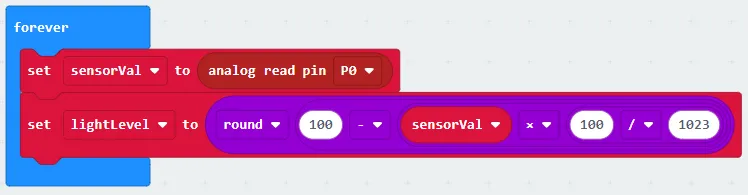
As the photoresistor’s sensor output is analog, we can calculate the detected light level as a percentage & pause the code so that the percentage can be displayed on the LED grid. The code for this section will go inside the ‘forever’ block.
- Creating a variable for the sensor output: In the Variables tab select “Make a Variable” & name it “sensorVal”.
- Reading & storing the sensor output: In the Variables tab select “set (variable name) to (number), change the variable name to sensorVal & set it to “analog read pin P0” (also found in the Variables tab).
- Creating a variable for the light level: In the Variables tab select “Make a Variable” & name it lightLevel”
- Calculating the light level: In the Math tab select -
- “0 / 0” & change it to “100 / 1023”
- “0 x 0” & drag the previous 2 code lines inside the code snippet so that it becomes “1023 - sensorVal - 100 / 1023”
- "0 - 0" & change it to "100 - 0", then drag the previous code snippet to the left hand side so that it becomes "100 - sensorVal x 100 / 1023"
- “Round (number)” and set the number to the previous code line
- Setting lightLevel to the calculation: In the Variables tab select “set (variable name) to (number)” and select the variable to be lightLevel & set it to the math expression we created by dragging it inside the code snippet.
Displaying the percentage:
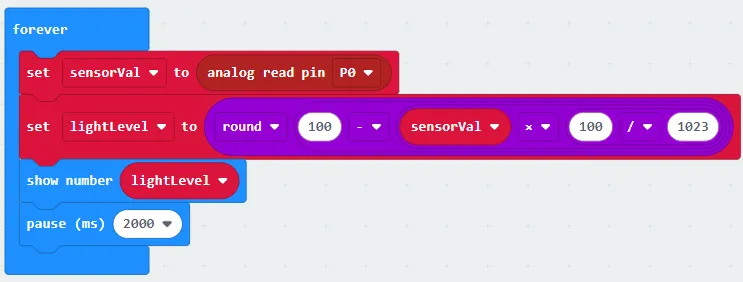
The code will have to be paused for a specified amount of time so that the micro:bit is able to display the percentage on the LED grid before executing the next task. The code for this section will be inside the ‘forever’ block.
- Displaying the percentage: In the Basic tab & select “show number (number)” & change it to “show number lightLevel”.
- Pausing the code: In the Basic tab select “pause (ms)” and set it to 2000 (2 secons).
Flashing the code onto the Micro:Bit:
- Make sure the Micro:Bit is connected to the computer
- On the bottom left corner, click the “Download” button and follow the prompts
Python Code:
Entire python code for the tutorial:
Simulated Light Percentage
Displaying the sensor's output as a percentage for varying levels of brightness
Downloadable Content:
Please find this tutorial's python & hex file for microsoft makecode on our Github.
Credits:
- Microsoft
- The Micro:bit Community
- The STEM Community