

Micro:Bit LED Ring Tutorial
Tutorial Aim:
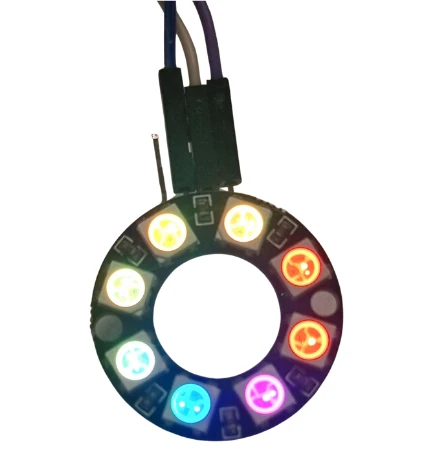
To create a rotating color effect on an 8-bit RGB LED strip/module controlled via the KittenBot RobotBit extension. The colors will shift position around the LED ring/strip, cycling smoothly to give a moving light pattern.
Requirements:
This tutorial makes use of the Micro:bit Electronics Learning Package. The parts list is shown below:
Pin Layout:
| Micro:Bit Pins: | RGB LED Module Pins: |
| GND | GND |
| 3.3V | VCC |
| 8 | IN |
Setup:
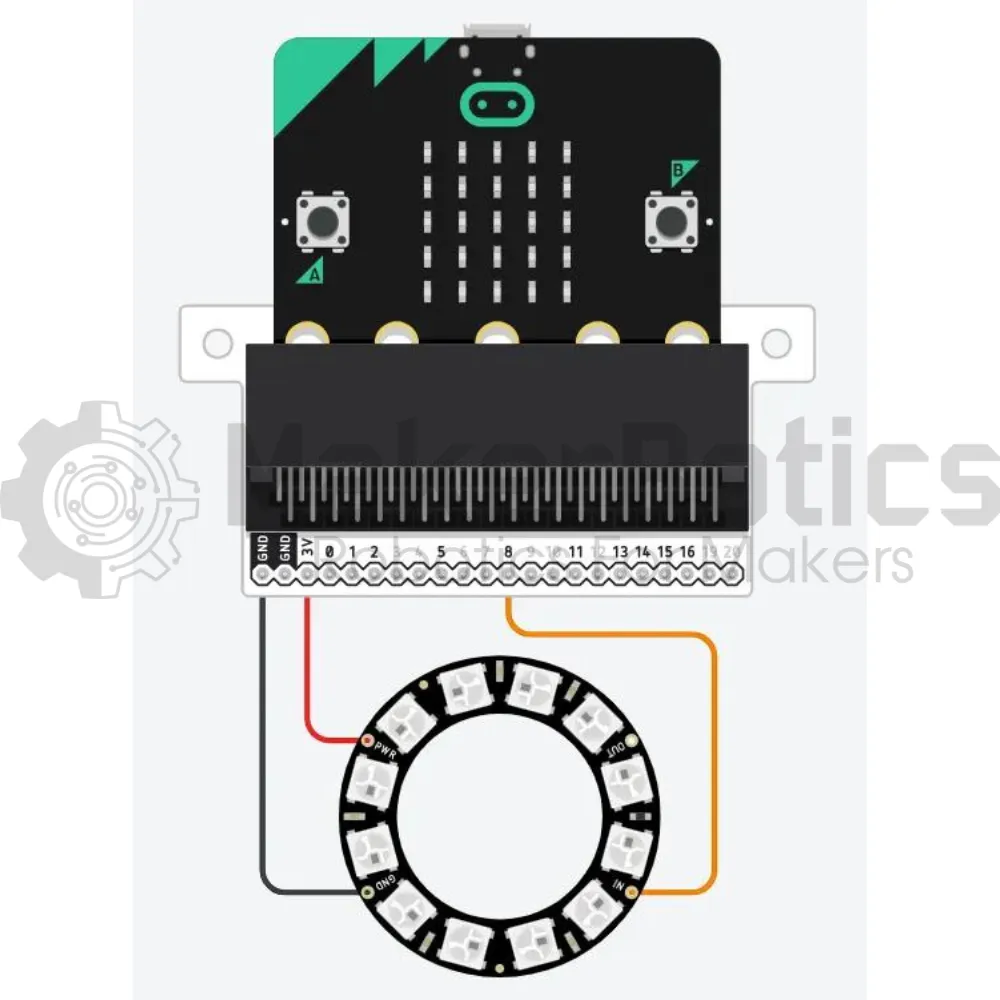
Please refer to the diagram below for wiring. Please note that the circuit diagram uses a different Micro:bit shield than the supplied in our package, despite this, the wiring is the same.
- Connect the LED ring to pin 8 on the Micro:Bit using the crocodile clips
- Open Microsoft Makecode
- Plug in the Micro:bit to the computer
Code Walk Through:
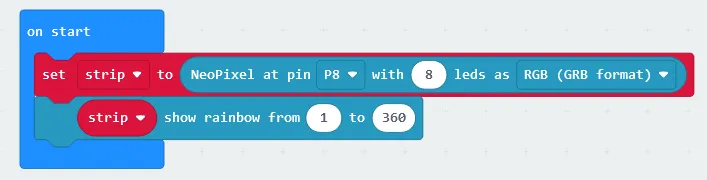
Initializing led ring:
To initialize & configure the LED ring we need the robotbit extension by kittenbot. The code for this section will go inside the ‘on start’ block.
For more information about the extension https://makecode.microbit.org/pkg/kittenbot/pxt-robotbit
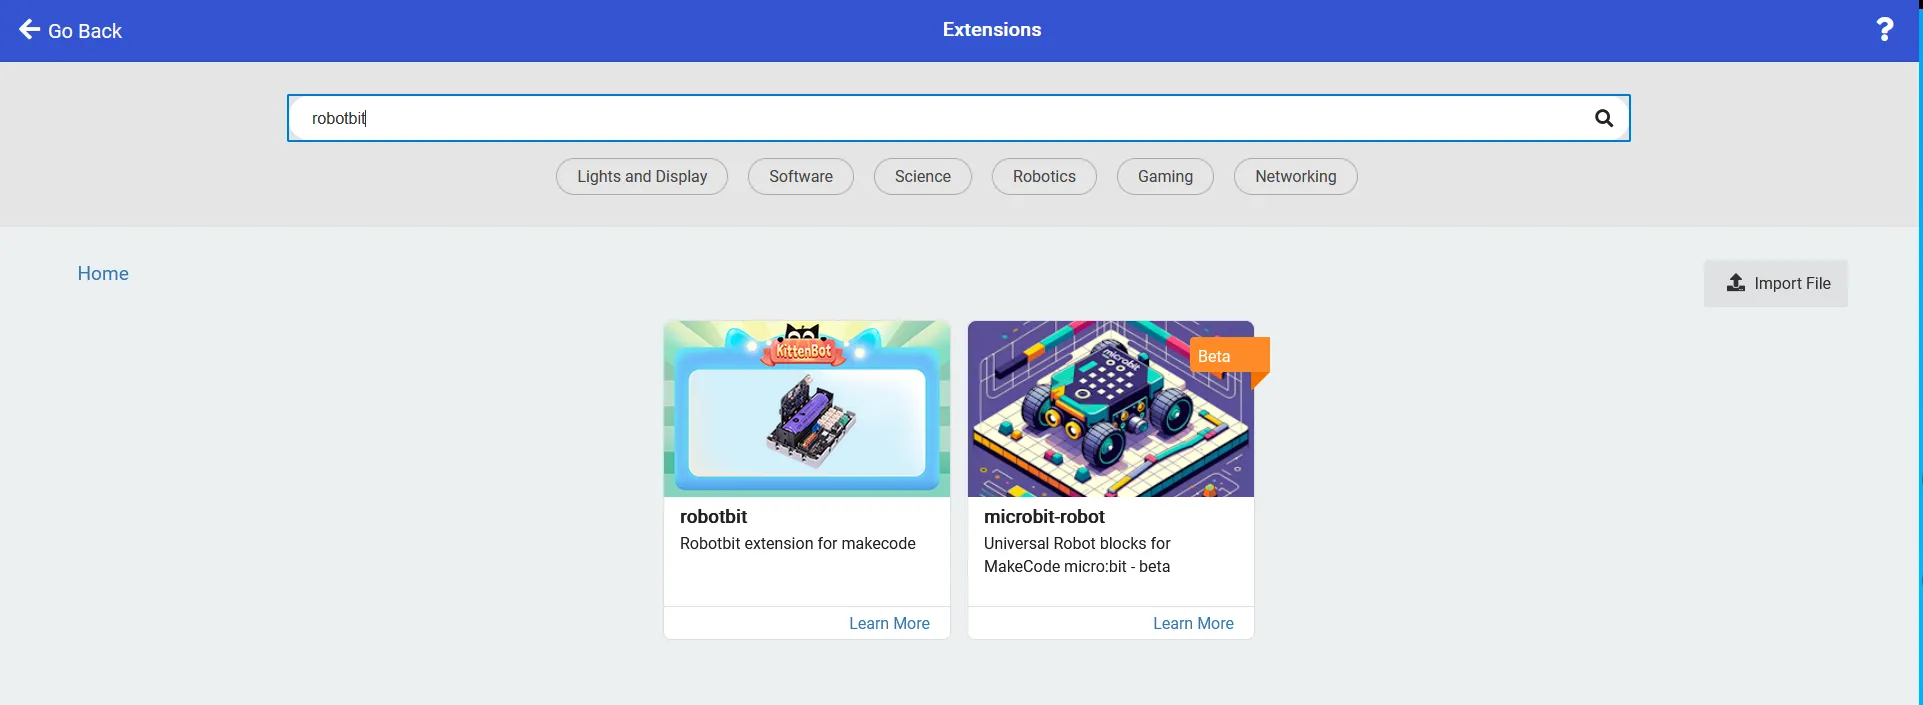
- Adding in the extension: In the extensions tab, search for the robotbit extension by kittenbot
- Initializing the led strip: In the Neopixel tab, select “set strip to NeoPixel at P0 with 24 leds as RGB format” & change P0 to P8, and 24 leds to 8 leds
- Calibrating the led colours & formation: In the Neopixel tab select “strip show rainbow from 1 to 360”
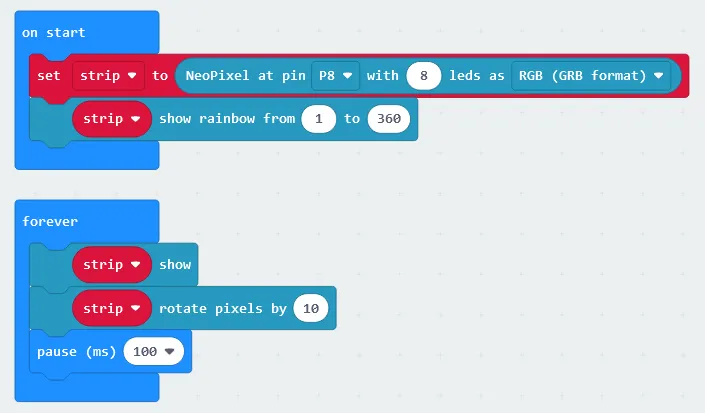
Displaying & updating the led ring:
Updating the LED ring to rotate colours before displaying the colour formation. To display the colours for a specific duration we can pause the code before it continues to the next iteration . The code for this section will go inside the ‘forever’ block
- Displaying the LED colours: In the Neopixel tab select “strip show”
- Rotating the pixels: In the Neopixel tab select “rotate pixels by 1”, change the 1 to 10
- Pausing the loop for a specified duration: In the Basic block select “pause (ms) 100”

Flashing the code onto the Micro:Bit:
- Make sure the Micro:Bit is connected to the computer
- On the bottom left corner, click the “Download” button and follow the prompts
Block Code:
Python Code:
LED Ring Simulation and result:
Downloadable Content:
Please find this tutorial's python & hex file for microsoft makecode on our GitHub.
Credits:
- Microsoft
- The Micro:bit Community
- The STEM Community