

Help Center
< All Topics
Print
Getting Started With Teensy And The Arduino IDE
Step 1: Download the Arduino IDE
- Visit the Arduino website to download the Arduino IDE version 2.x.x. Note that all versions from 2.0.4 onwards are compatible, but it is recommended to use version 2.3.0 or later for enhanced features in the Boards Manager.

Step 2: Install Teensy on Arduino IDE 2.x
- Open the Arduino IDE.
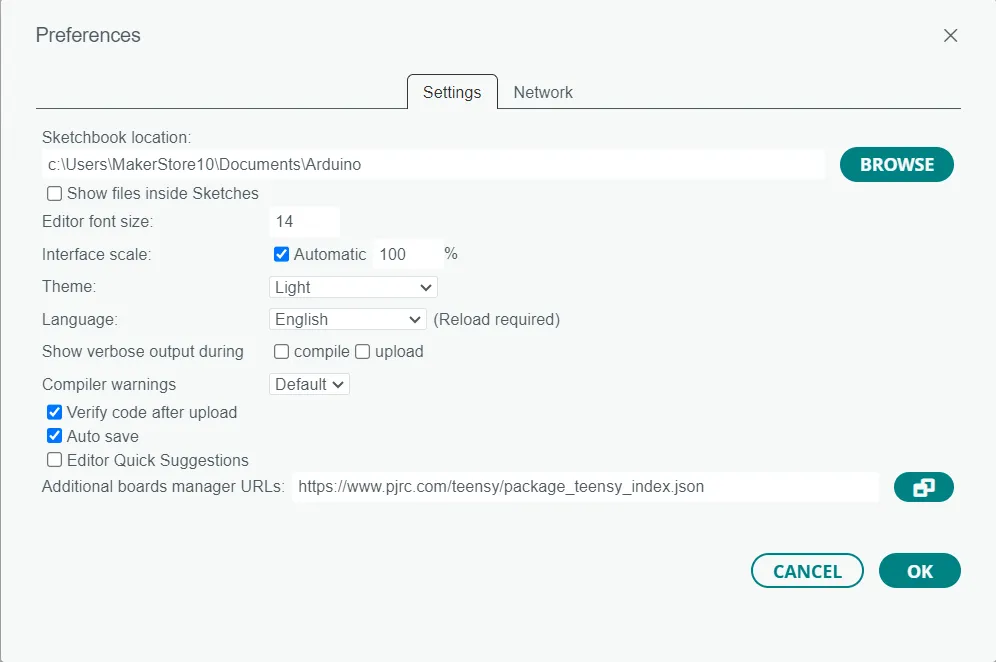
- For Windows/Linux: Navigate to File > Preferences.
- For MacOS: Go to Arduino IDE > Settings.
- In the “Additional boards manager URLs” field, add the following link:arduino.
https://www.pjrc.com/teensy/package_teensy_index.json
Step 3: Install Teensy Boards
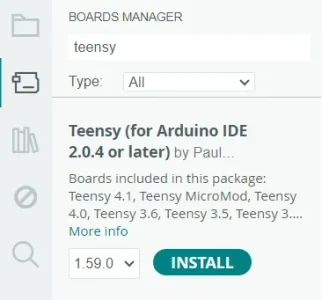
- In the main Arduino IDE window, click on the board icon located on the left side.
- This will open the Boards Manager.
- In the search bar, type “teensy”.
- Find Teensy in the search results and click “Install”.
Testing The Teensy:
Step 1: Loading the example
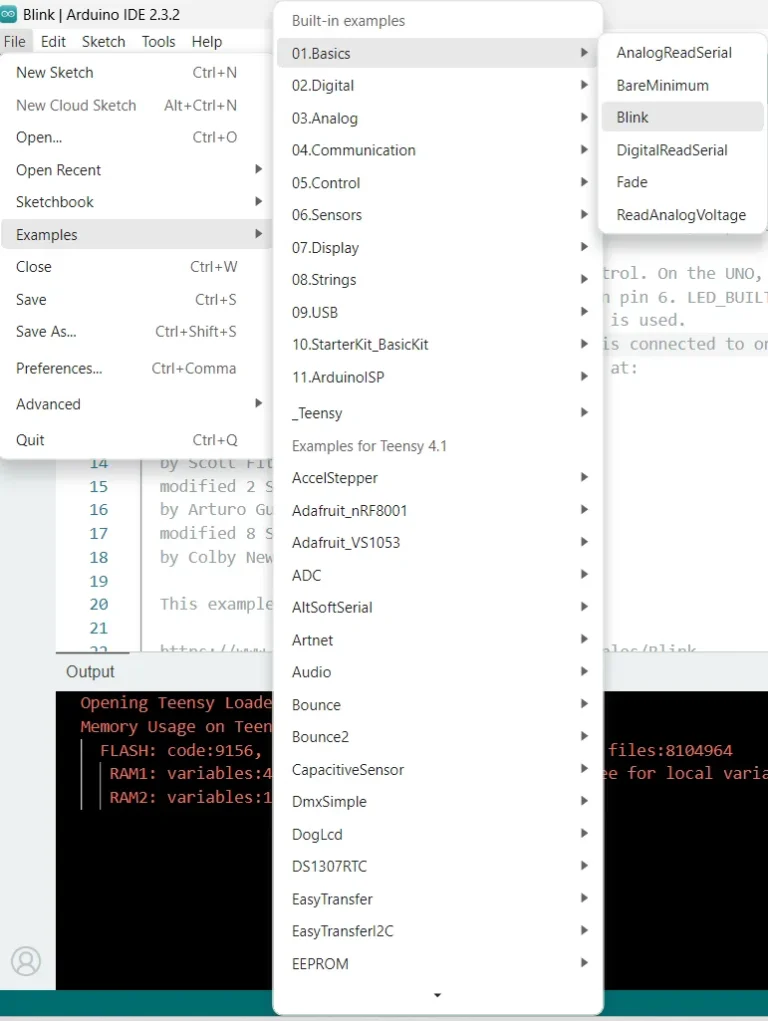
- In the main Arduino IDE window, go to File > Examples > 01.Basics > Blink. A new Arduino IDE window will pop up
Step 2: Uploading to the teensy
- Connect the teensy to the computer
- In the Blink Arduino IDE window click the arrow for 'Upload'

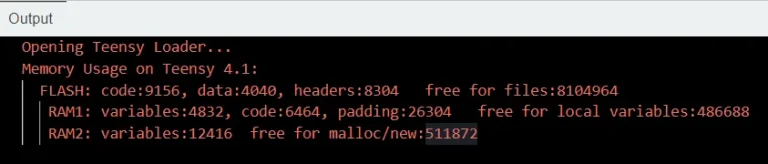
Step 3: Output
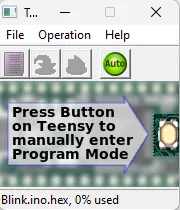
- A teensy upload window should appear, and the LED on the teensy should blink periodically.
- The output should indicate the memory usage of the arduino sketch, and any errors if they occured.
Troubleshooting Tips
Boards Manager URL Not Working:
- Ensure there are no extra spaces before or after the URL.
- Verify your internet connection.
Teensy Not Showing in Boards Manager:
- Confirm that the URL was correctly added to the “Additional boards manager URLs” field.
- Restart the Arduino IDE and try again.
This guide should help you smoothly set up the Arduino IDE with Teensy support. If you have any further questions or encounter issues, feel free to ask for additional assistance.
Full Blink Sketch Code:
If you are unable to access the Blink example sketch, please copy & paste the full code provided below into a new Arduino sketch.
// AUTHOR: TZ of MakerBotics
// VERSION: 1
// DATE: 2023/08/30
// PURPOSE: Blink an LED on Teensy 4.1
// License details:
// Attribution-ShareAlike 4.0 International
// CC BY-SA 4.0 Deed.
#define LED_PIN 13 // Onboard LED pin for Teensy 4.1
void setup() {
pinMode(LED_PIN, OUTPUT); // Set the LED pin as an output
}
void loop() {
digitalWrite(LED_PIN, HIGH); // Turn the LED on
delay(500); // Wait for 500 milliseconds
digitalWrite(LED_PIN, LOW); // Turn the LED off
delay(500); // Wait for 500 milliseconds
}
Credits:
- Arduino
- The Maker Community
- The STEM Community
Table of Contents